
This sweet little side table came to us while we were cleaning out my great uncle’s house. When I first saw it, I knew it wanted a much needed new life with us at the Halle House. Its charm was covered in an inch of dust and old magazines, but I saw right threw it and knew it was coming home. Brian was much less enthused, but as my Design Assistant he carried it out to the car 🙂


As you can tell, there was some stuff, I really don’t know what it was, that crusted on there over the years. It was a great little piece with a ton of character, but desperately needed some love. I was between painting and staining it. So I polled my followers on Instagram and my friends on Facebook and the response was completely split down the middle. Minus my brother (Hi, JD) who suggested that I use it for fire wood. *sigh*
Since the response was a tie, I thought. Why not both? So this was my very first paint and stain mash up and I’m so happy with the results!
Here’s how I did it!
What you’ll need:
- Stain (color of your choice)
- Chalk Paint (color of your choice)
- Sander

That sander made this project infinitely easier! No joke. I sanded the entire table in about 12 mins flat! 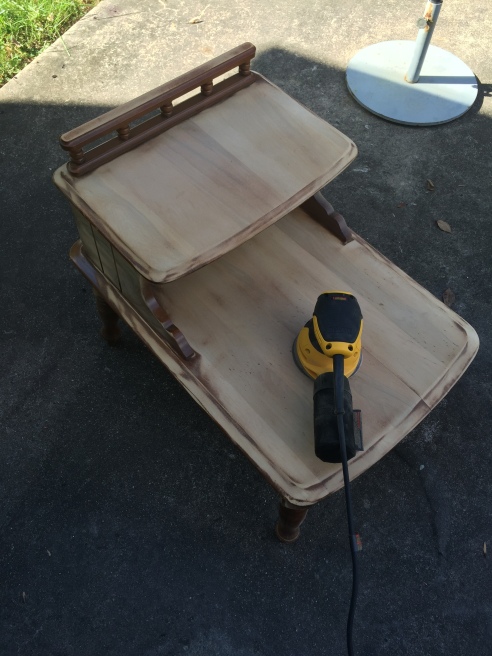
Here it is in action!
After I sanded it down with a 80 and 120 grade sand paper, it was ready to be stained! I took a piece of old dish towel to apply the stain color. I keep old dish towels on hand and cut them into useable pieces for all my projects!

I actually really liked the way the two different stains looked. In the future I’m going to find a project to incorporate this idea! …One day.
I gave the stain two hours dry time on our back patio since it was beautiful outside. I was so surprised with how quickly it dried. I didn’t think I would be able to get a primary coat of paint on before wrapping up for the day, but I did! I had to bring it inside to dry though. Here’s the first coat of white paint.
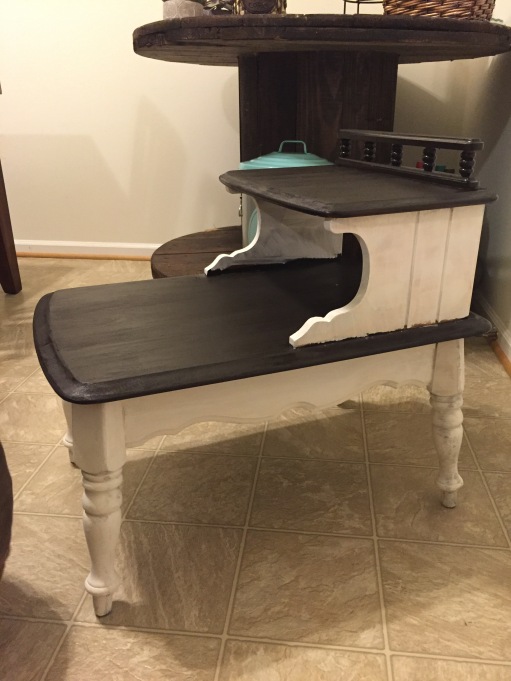
I was able to put another light coat of paint on the day after and it looks spectacular! I didn’t want the paint to look perfectly even. I like the imperfection of uneven brush strokes. It makes the piece look older and gives it another layer of depth.
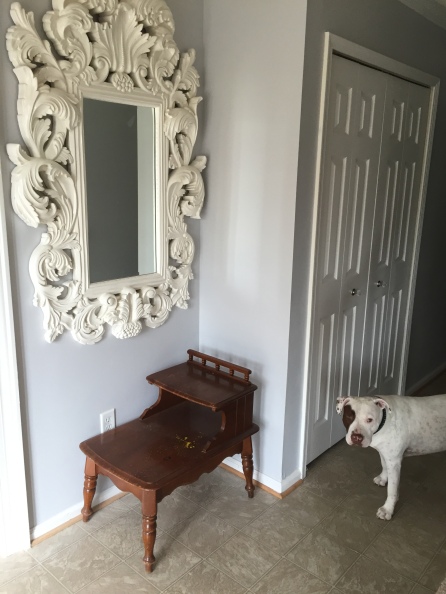
Here it is styled in our foyer. It looks so fresh and happy!


I have a similar table that had me stumped. It looks incredibly dated. Now I can’t wait to get down to hardware shop for the materials. You have inspired me with the dark stain top. Makes all the difference. Well done you! Su, Shrewsbury, UK.
LikeLiked by 1 person
Thank you so much!!!! This was such a fun and easy DIY to do!
LikeLike
Good luck on your table!!
LikeLike
Love, love, love it. I have a table similar and can not wait to try this. Thanks for the idea
LikeLiked by 1 person
I am trying to copy you, but when I put the stain on, a wet glass stain appeared, it did not show when sanded,
now what?
LikeLike
This has never happened to me, but I found this article! Hope it helps! https://www.google.com/amp/www.rd.com/home/cleaning-organizing/how-to-remove-water-stains-from-wood/amp/
LikeLike
My husband re-sanded it and will re-stain and see if it comes back, may just have to paint
LikeLike
Love ,all that you have done,I all so. Love doing this to.I have recycled a lot of things..I look for old things that I can fix …just love doing this..
LikeLike